Now the body is painted, I can go on with the dashboard, the electric components and cables, in fact with a lot of things that are needed to make the car run.
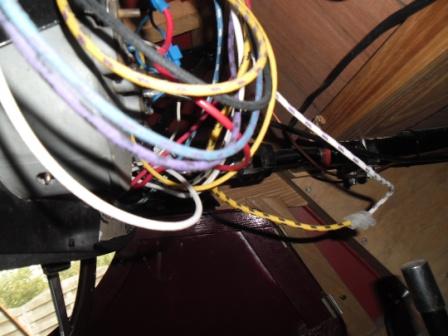
So I started putting the wiring loom in the car, because that have to be done before the dashboard comes in, so you can connect all the wires without laying on your back underneath the dash.
It was supposed to be a straightforward job, because it is a new wiring especially made for me by Autosparks (http://www.autosparks.co.uk/) But it turned out that the main wiring cable that goes from the regulator box to the dashboard was too short. I could solve that problem by giving the cable another route, but I dont like that. On the pictures of my old worn body, I could perfectly see where it has to be. So no concessions, it has to be right.
First I contacted Autosparks about it, and they were surprised but very friendly and helpful. They never had that problem before I was told, and I am
willing to believe that. With only a few LHD examples of this specific model made
or left, I simply think they never had to make a LHD wiring before J. They suggested
that I measured everything up, send the wiring back, and they would adjust it
where needed. But my proposal was that they send me 1 meter of every wire and
colour they used, so I could do it a la carte here at home, and so we did. In
3 days I had the wires, and it took me half a day soldering and isolate the
wires separately, followed by a complete isolation coat of cloth tape. You
cannot see where it has been lengthened, and it fits like it has to be, so that
was what I wanted. There colour codes where absolutely perfect, so from that
moment on, it was a real straightforward job J.
After that I had to make extra wiring for the indicators, because the
car did not had them in his younger days. Not only a wiring for the switch, and
the control light, but also wires to the front and to the back of the car. Not
too difficult all that, but it took a lot of time to fix all the wires in a
proper way...
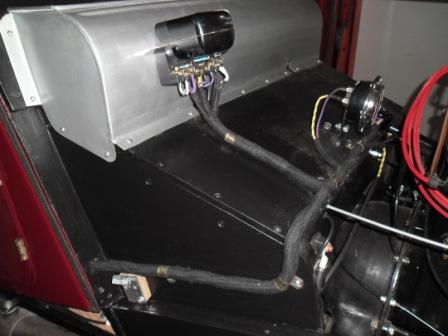
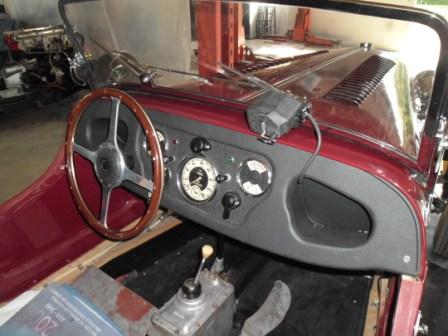
Then the renovated dashboard came in, and I did a test start to see if
all my electric components where working. Apparently the dynamo was not
charging, although I tested it after the rebuild. So I looked and tested
further, and the control box was the bad guy. This control box has 9
connections, so an example from an MG or so could not be used. But it came out
that it was no problem at all, I simply bought a new one at Auto electrics. (http://www.autoelectricsupplies.co.uk/)
So now I could start putting the windscreen together, and placed on the
car. A while ago I had the windscreen frame dissembled and the chroming company
had made it look like new. They also took care of the pillars that come on
the body, and where the frame fits in. Those pillars where brand new ones, that
I bought from George, the series one pope. He had a few of them made by casting
company especially for him, made with some old scrap as an example. They still
where in ruff bronze, but the chroming company took all the finishing work for
them, and the result is great.
The glass part of windscreen was also in bad shape, scratched all over.
Buying a new one was impossible, it did not exist. And due the special cut out
parts for the wiper mechanism, the screen of a younger model was also no
option.
So I took my old screen to the local glazier, to ask him if he had a
solution for me... He looked at it and said, OK, I cut you a new one. He did it
the following day, and then it went to a specialised firm to be hardened, so it
can be used as a car windscreen. Simple as that, where was I so worried about J.
The new glass part went in the frame and I sealed it with Sicaflex, a
windscreen sealing product used to glue windscreens on to cars. First I
measured the glass, and then the inside of the windscreen frame. Then I made
some rubbers and placed them in the frame, so the glass was already fixed in
place. Then the Sicaflex was injected and nicely wiped off where the glass
meets the frame. A job where one should were gloves, as I know now J. But the end
result is perfect, and my hands became clean again after a day or 10 J.
A new rubber seal (MG TD) on the underside of the frame - where the
frame meets the body came on, and my renovated windscreen was ready to be put
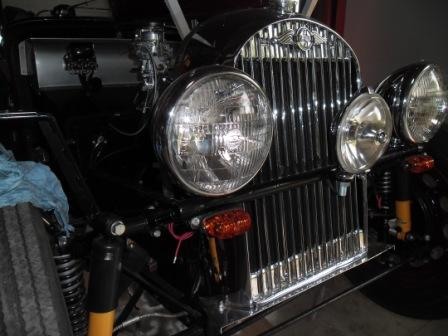
on the car. Then the headlamps and front indicators came on, and from that
moment one it started to look like a real car.
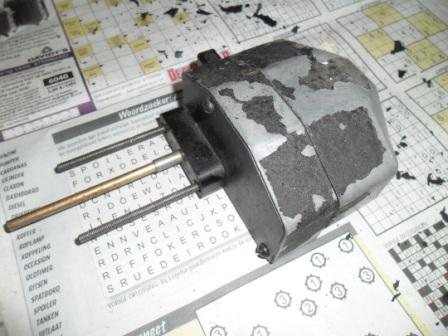
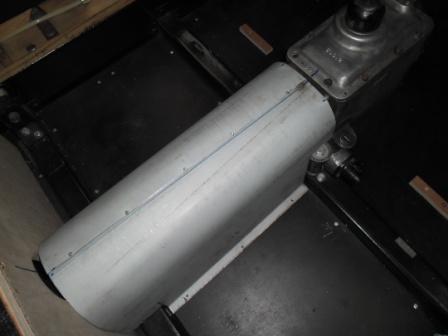
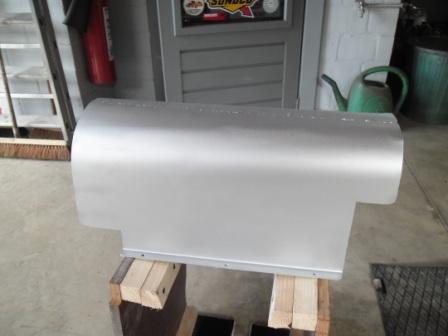
Then came the wiper motor in sight - or rather not - because it was not
in the pile of parts that came with the car. It has to be a Lucas as used in
so many British cars of the past. So I bought me a used example on Ebay, that
had to be reconditioned. You find them also all ready, but the price is than
rather high.
The one I bought looked rather tatty, but inside it was not bad at all.
After cleaning the anchor and windings I putted new brushes in, and a test
proved its working. Then I took all the paint off and gave it 3 good layers of
wrinkle paint, so now it looks like new. A new wiper mechanism and wipers were
ordered at Vintage car parts, so everything was there to finish that part. (http://www.vintagecarparts.co.uk/)
Great sight, and a real boost to go one with the rest of the
restoration. I did a security check of all the bolts and nuts that secure the
suspension. So I could say to myself: OK this is all done and would not fall of
when we do a test-drive J.
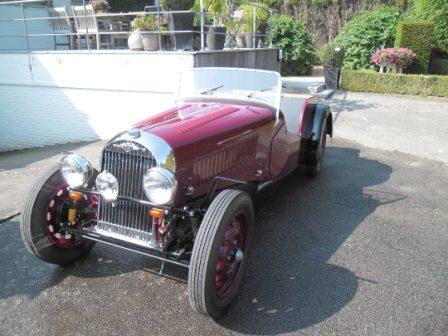
And that moment came very fast, it was itching too much, I had to do a
test drive. Simply on the little road here on the back of our garden. I did
this first run together with my granddaughter, my strictest judge. We were
sitting on improvised seats, in fact wine crates with a little foam on top, and
a simple wooden plate was promoted to backrest. It was a short but great ride
without any comfort, no doors, no wings, no licence plates... But oh boy, was
this FUN ! And... the car was running surprisingly well.
Next step: preparing the car for the upholstery company. A bit painful
for me, because I like to do as much as possible myself, but for this I needed
a specialist.
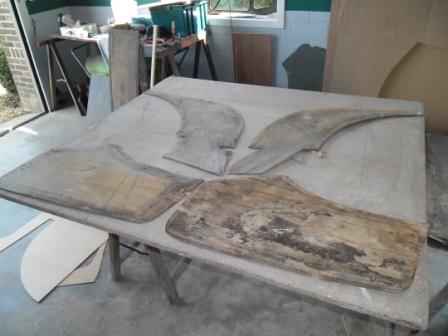
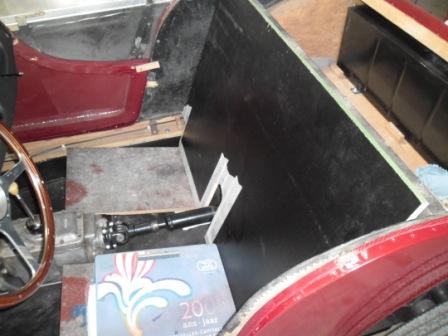
The problem was that I had only the sad looking panels from the old
interior. No seats, no backrest it is a bench type nothing. So everything
has to be made using the pictures a took, every time I had the chance to see a
series 1, and what I could see in the Original Morgan book etc.
Luckily I also had the side panels from the boot, and the wooden piece
that crosses from left to right and acts as a support for the backrest, and
also fixes the hood frame. So I could exactly determine where that back had to
come, and that seems to be good start...
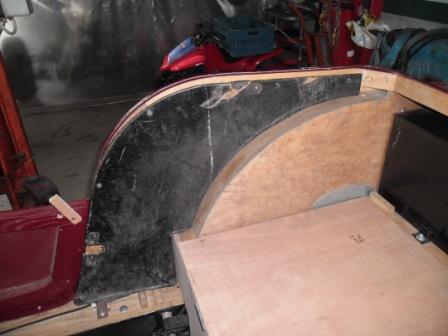
So with a little bit of fantasy and a part of common sense, I was able
to make a backrest that seems to be of the right dimension, and sitting in the
proper spot. Not easy because I had no references, but it all seems to be in
the right place.
Then I made new side panels, so the upholstery man can work on a good
base for Those Items. I find that it is not his problem that my car is missing
some parts, I have to provide the basics and information he needs, so he can
make an upholstery as I like it to be.
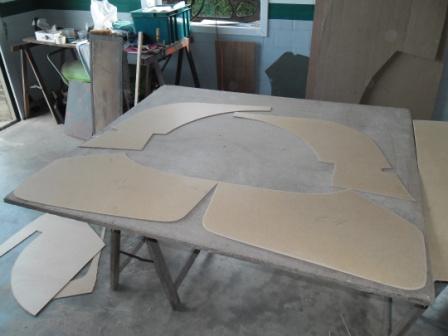
Then I made the little benches that come under the seat cushions - high enough
so that after cutting them down a few times, they were adjusted to my
personal length. An important matter, the space inside is so limited, that
every cm. counts. And beside that: I dont want my head to come out above the
windscreen, my hair is already getting so thin J. And finally I made the tunnel for the prop
shaft, another missing part. And again I had to use my imagination to create something
that looks as I think it has to be. In
one movement I also adjusted the height of the tunnel to what will be the total
height of the seats, so it will all look as if its made for each other J.
So up to the trim shop now, a very big and final step in the restoration
process of my series one...


