Now the ruff work on the body is done afterwards its seems that it was
the easy part - it is time to make everything tight, smooth, and ready for
painting. But all that is faster said than done. Mainly it means hammering as
much as possible dents out of the body, filling some dents with thin, and using
a metal file (more a grater) to straighten the metal. All that to ensure that the
use of filler can be limited to the minimum.
But some dents in the bonnet and the rear panel do not differ, the
condition of those panels was terrible after about 40 year storage combined
with a few house moves. On top of that the
(after war) metal is so thin (0.8 mm.) that you have to be careful when you
start sneezing J,
the metal was stretched where dents used to be, and it was impossible to get a
plain surface just by cold hammering.
So I had to use a technique I learned some 40 years ago as helper of an
old coachbuilder - real craftsman - or at least what I still could remember of
it. Shrinking they call it, and its all in that word. I had to shrink the
metal by making a little round spot (about the size of a 2 piece) flaming red
with the blowtorch, and then fast round hammering from outside to the inside, then
followed by cooling the whole thing with a bit of water and a sponge. To be
honest, it took me some time before it would go a little bit like I hoped, but after
some training spots on a loose piece of metal it did. I think I spend about 5
hours warming, hammering, cooling and grating. But after that it all looked
straight enough to take the next step.
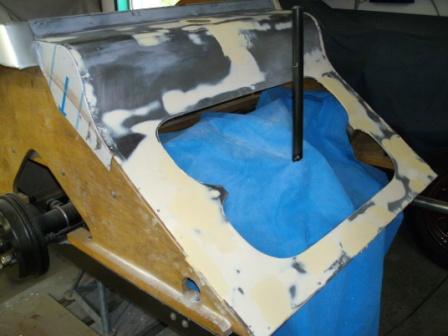
So now I made the surfaces (except the front wings) straight with a good
quality filler, sanding them down, filled the little dents again, and sanded
them down. And again, and again... At a moment it looked as if the whole body
was covered with a thick layer of filler, but thats only a first impression. I
think that even on the worst parts, the filler has no more thickness than 2
millimetre. I used 3 kg. of filler on the whole body, and you can count that
75% comes off again with the sanding. For me that result is more than
acceptable.
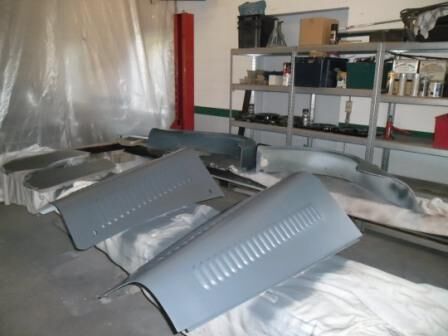
After that came a coat of spraying filler, to get the last scratches of
the ruff sanding out, followed by a few good layers of primer.
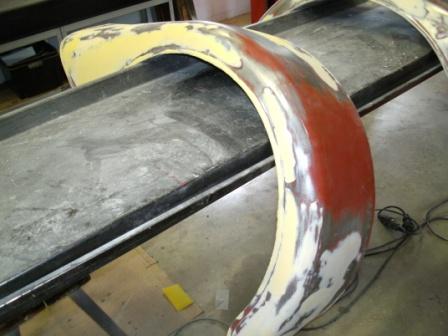
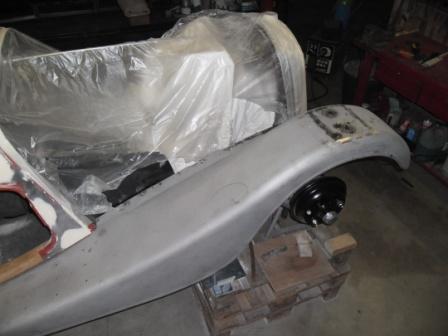
The front wings came next. There metal is much thicker, so I had them
sandblasted by someone that knows how to handle such parts. A lot of filler and
old paint came off, but basically they where surprising good. I just had to
weld in a little piece of metal where they fix on the front support, because
that part is double, and so rust can go its way there. And on the rear where
they are bolt on the rear wings, that also needed a little bit off new metal.
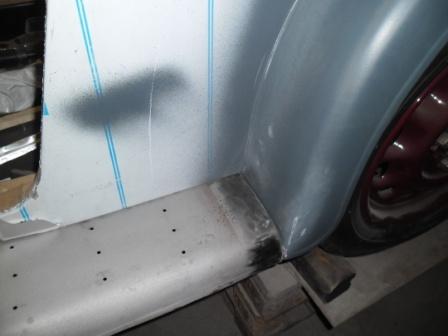
But making them straight was another story, it took a lot of time,
simply because they are so long and in the past on several spots repaired with
a lot of filler.
Getting a nice smooth surface was not so easy. Hammering the dents out
was one thing, getting the wings straight after the filler another. Especially
because I first tried to do it with the sanding machine, but I could not receive
the result I wanted.
To cover a much greater part of the wing in one time, I made a simple sanding
block (60 cm) from a piece of wood, and nailed the sanding paper on the head
ends. So now I could cover much longer strokes, almost the whole wing, in one long
smooth move. That worked well, so again filler sanding filler sanding and
so on. Than after much elbow grease, spraying filler came on, sanding again...
and then followed by a few layers off primer.
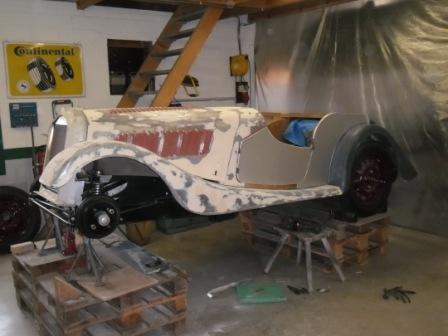
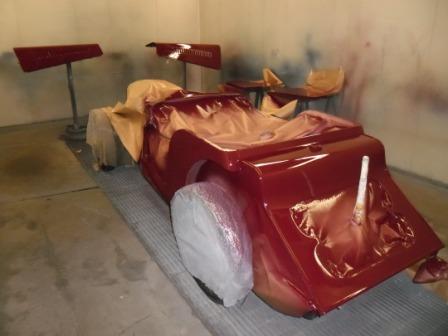
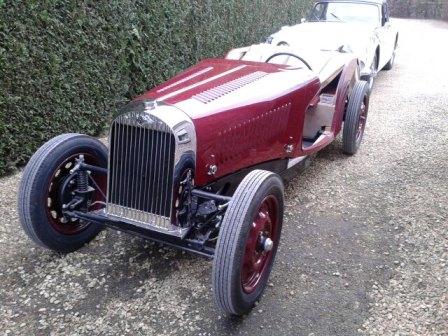
From the start of this adventure I decided that the body would come in a
warm maroon, and the wings in distinguished black. So now it was time to paint
the body, so I could finally go further with the more visual part of the
rebuild. For that purpose I hired the spray cabin of a small garage here in the
village, to do the paintjob myself. Geert the young owner dont mind to let
me work in it, because I used to work in several paint shops when I was a lot younger.
One of them was in fact in that same garage, but then owned by his father, who
is after 40 years still a friend. So over the years I always managed to
maintain a part of that skill, as a helping hand here and there.
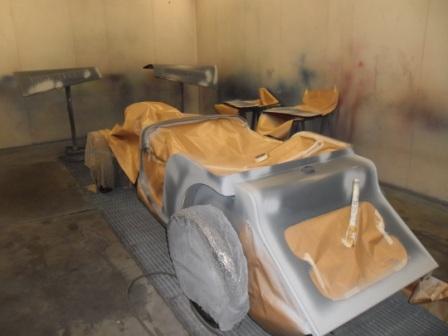
I used two pack paint off course, but not the version with a varnish end
coat , because that finish would be to modern. But on the other hand, to make
the end coat stronger, I always use a bit of pure two pack varnish in my final
coat of paint. The result is always stunning...
25-04-2014, 00:00
Geschreven door Jeff OdH 
|


