|
It is October 2011 now, and it has been a long time since my last progress rapport. The summer has ended now, but despite the bad weather in the last few months, I did not found much spare time to work on the Morgan. In the garden everything keeps on growing, and I had to cut and weed like a real professional gardener. And despite being a real petrol head, I far from hate that kind of work. It is something else, and gives me a bit of a green image, not bad at all 
That in combination with maintaining my other cars summertime always means a lot of driving, good or bad conditions - as hold me back from making much progress on the series I project.
But still I did managed to have the front sub frame, and the empty banjo and rear springs back on their spot. I also replaced the ugly rear shock absorbers with the correct type of friction dampers. They were rather easy to find in the UK, although again not cheap. Since the old ones were non original, I did not had anything to match my pretty new ones with the chassis. So I had to search for appropriate bolts, and make bushes to fix them properly. Thereby using the photographs I made earlier at Georges Proudfoods workshop as a guide.
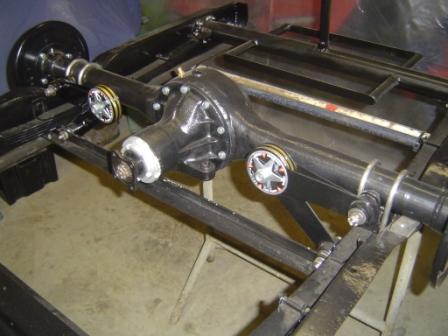 
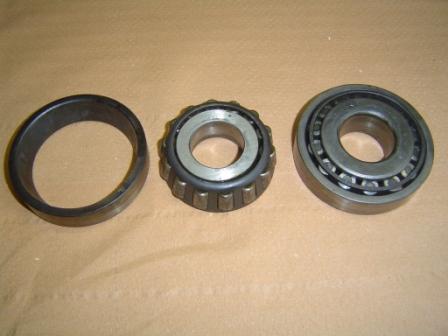
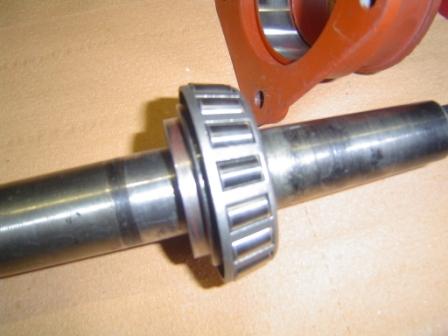
Next big problem to solve where the roller bearings for the rear axle. When I discovered they were covered with surface rust, I simply thought to buy new ones with the same number. But it turned out not to be that easy, because the original bearings are tapered on the inside, as is the axle. That makes that they are simply pushed on the axle, and stop on a certain pre calculated point. But soon I had to find out, that kind of bearings do not exists anymore
Plan B started
I had to find a bearing with the same or about the same outside diameter, so the bearing housing could accept the cup without too much machining and/or lost of wall thickness. On the other hand, with an inside diameter not much bigger than the axle, but big enough to have space to accept a custom made conversion bush. I had to be a bush that catches the tapered axle inside, and accept the straight bore new bearing on the outside. Finding that bearing was the most easy part, I dived in the roller bearing catalogue, and bought an new set of bearings following the ISO standards. Outside almost a perfect fit, and inside with a diameter of 35mm.
 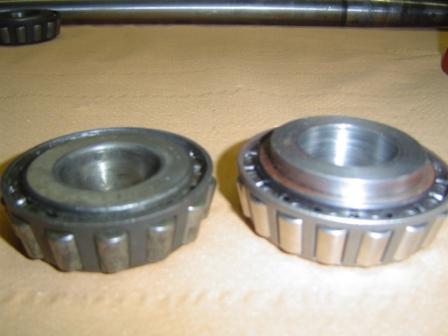
After much thinking about how to handle, because the new bearings have to end on exact the same spot as the old ones, I measured the distance from the back of the original bearing in place, including the housing, to the top of the axle. I argued that if the housing came back on exact the same spot, the end position of the axles would be exact the same as original. So the bushes had to have another inside (tapered) diameter than the original bearings, because there has to be a stop collar of 3.5mm on the bush, to keep the bearings from moving forward in the direction of the differential. Since I had already 2 mm profit, being the difference in thickness between the old and new bearing, I only had to move a little bit forward on the axle to catch the extra 1.5 mm finally required. Easier said than done, in fact for me not an easy exercise.
But help came in the person of Kurt, son of a good friend, and a very modest but clever technical engineer. Above that he is a real classic car lover, what makes the perfect combination. We discussed my solution, and we reached a consensus, we measured and measured again.
Then, he took a piece of paper and his portable Japanese brain. After a minute OK maybe two - he came with the angle that had to be used for the inside of the bush, just as simple as that. For me Chinese and Russian together, for him a fairly simple calculation
So once again that proves my parents were right when they told me ages ago not to quit school to early, and go for some extra years and an higher degree. But that motorcycle was so exiting, and the girls were so pretty
Or was it the other way around? By now it is so long ago that I cant remember 
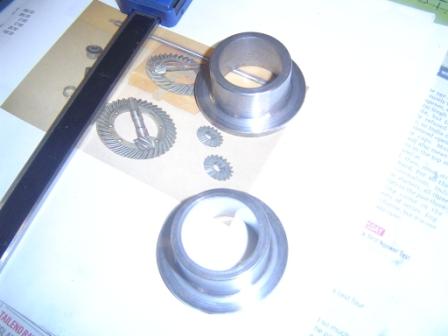
Finally Kurt presented me to make the bushes on the lathe. I had no objections at all, because despite all the right calculations, make a tapered inside in a bush is easier said than done. So when they were ready, the great moment to try them out the axles has arrived. The new bearings where pressed on the bushes, for extra safety sealed on them with Loctite, and tapped on the axles.
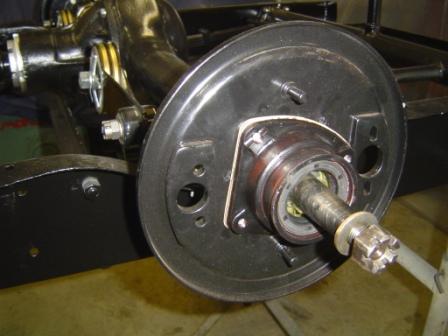
I placed the differential back in the banjo, and pushed the axles in. Then I bolted the brake back plates and bearing housings on, thereby re-using the old shims to adjust the correct lateral play as a test. It came out that I just had not enough play, the axles turned, but a little bit too heavy. So I made two extra shims, simply in sealing paper of 0.40mm. A perfect fit with the correct amount of free play was the result. I have to say correct because my very summarily workshop manual stated allow a little play. So how much is a little? I presume almost 1 mm will do.
So I took what I have as being correct, and moved on. Loosen everything back, the axles out, new oil seals in, and the whole circus back together. It looks and feels very good, so I am proud of the result. Now I can start on the rest of the rear axle, brakes and braking system. Easier said than done because of the cable braking system, but I look forward to move on.
08-10-2011, 00:00
Geschreven door Jeff OdH 
|


