Since my last report I tried to work a bit more on the Morgan, because I promised myself a rolling chassis by the end of the year. And although in first things did not seem to work out as I hoped, the pieces of the puzzle are starting to fall together.
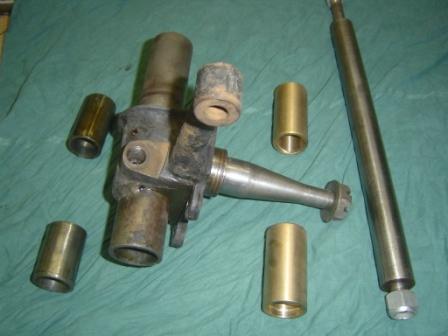
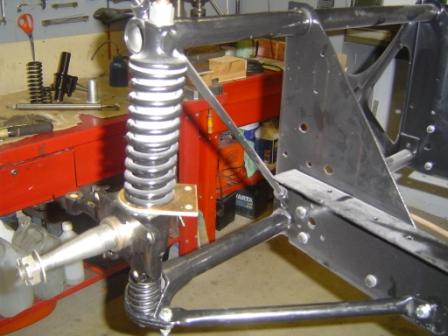
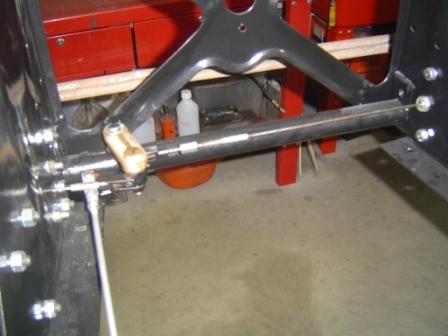
A big thing to do was the front suspension, the famous sliding pillar system. Although that looks a bit difficult or strange , it is not a real problem. I already had new bushes and new kingpins, so cleaning and painting the old units was almost the biggest job. Then I pressed the old bushes out and pressed the new ones in. Then made them a perfect fit with the reamer, and it was done. Putting things back together with the sub frame was fairly simple, with a piece of threaded rod to clamp the whole thing together as my partner in crime.
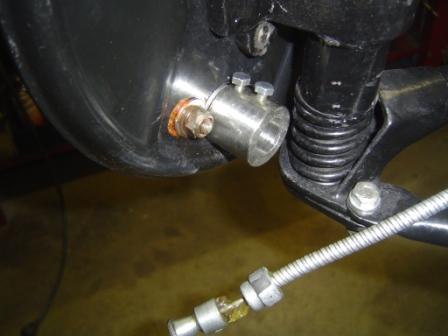
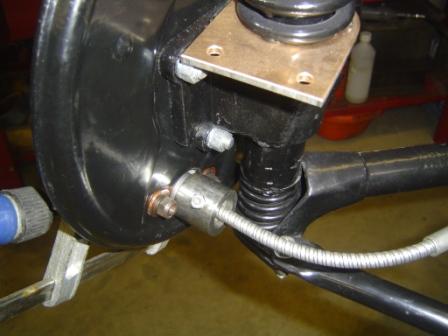
But the front brakes where another story. Normally that hat to be a simple and straightforward job, since I had everything on the shelf. But here, Murphy came look around the corner J.
I started with bolting the brake mechanisms on the back plates. But when I put the brake cables on their spot, first all looks fine, until I made some steering moves. Than they popped out the brake mechanism, like a devil out of a box. Impossible to leave that - you dont take risks with brakes - so I have to find a solution to convince them to stay where they have to be.
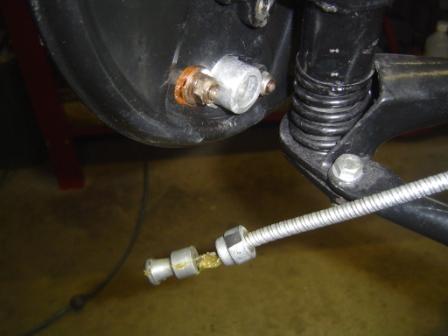
So I made a tube/bush with inside two different diameters, one matching over the brake mechanism, the other accepting the cable. So now everything is on the spot as original, but with a strong support from the outside. I made it with a small fixing bolt that clamps the tube on the brake mechanism, and another that blocks the brake cable once he is on his spot. So I can take it apart whenever I wanted or needed. And it seems to work perfect, the cable stays nicely where he has to be, doing what he have to do without jumping around like Michael Jackson in his better days.
Problem solved
I thought! Because then I discovered, when matching the new cables with the old originals, that they are on the LH side 25mm. too long, and on the RH side 25mm. too short. So I think but am not a specialist - that it is because mine is a LHD car, and the cables come from the UK and are for a RHD car.
So I carefully shortened the shell of the left brake cable, without touching the inner steel cable itself, until I had the same length as the old one. And on the RH side I made the cable longer by using a long (30mm) nut, connecting the new wired cable end with a stud I made from the old cable. Everything secured with Loctite to avoid loosening.
So now with the compensator in place, all fits well. And after I made a brand-new connecting rod between the brake pedal and the compensator, the braking system could be tested.
Then that I discovered that the rear brake cable, coming from the pedal an passing through the handbrake, is touching the gearbox. In fact he has done that in his previous living years so hard, that there is already a groove in the aluminium housing of the box. To risky to leave that, I dont want to brake one day, with a leaking gearbox housing as result. I find it rather strange, but things are what they are, and maybe all that was not so important in those days J.
So I made a spacer, that brings the whole handbrake mechanism about 12 mm. more out of the centre. And now the cable moves freely, just missing the gearbox. So my fear that on a good day braking would have cause a flood of gearbox oil in the car, has gone.
In the meantime I also had made a definitive choice about the future colour of the car. A burgundy chosen out of 6 colour tests I did. Too dark
too light
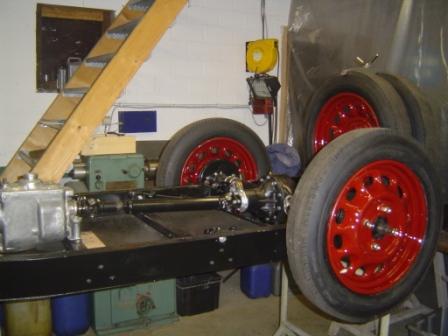
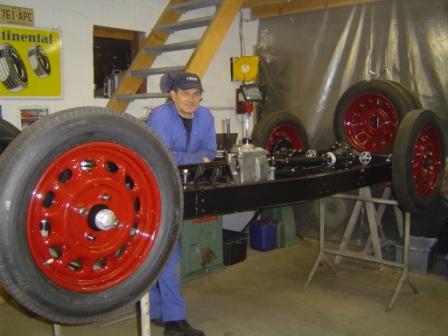
That it! And that mains that I finally could paint the wheels, and put the new tyres on. They look great, the rust damage is all gone, and the colour is even better than I hoped!
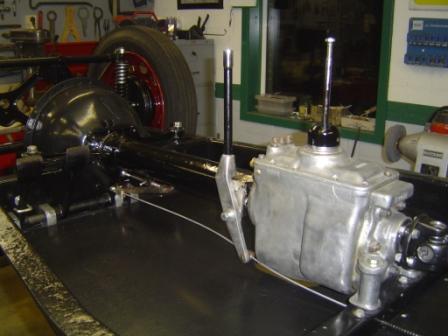
So now my next big job is finding a good steering box - mine is incomplete also I have to put my engine together, and find a solution for the radiator and radiator shell. That has to be re-chrome plated, but the radiator is fixed on it with tin.
The guys from chroming company looked at me as if I came from mars when a asked them if they could do that job, and in the radiator company they thought that I was joking
So a new and big challenge for 2012
Lets go for it!
16-01-2012, 13:25
Geschreven door Jeff OdH 
|


