|
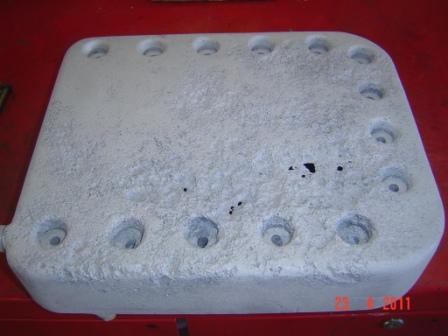
As I mentioned in first things first, the oil pan is badly damaged by corrosion. And since it seems to be almost impossible to find a replacement, I had to be inventive about repairing the one I got. Repairing seems to be the only choice, simply because the price quotes that I got to cast me a new one were too high. High but perfectly understandable, because all that work to make just one example, makes it extremely expensive.
So my first thought was to have it welded by a specialists firm, but my Australian connections advised me not to do that, because of the poor quality of the aluminium. And when I had a good look at it, I could do nothing else than agree with them, that aluminium looks more like gingerbread than metal. They told me to use some modern epoxy stuff to repair and even rebuild metal parts, rather than taking the risk of burning even bigger holes in the pan, trying to have it welded.
So I contacted my colleagues at work from the technical department (I work for the Flemish public transport company De Lijn) and asked them what they could advise. After some thinking they came with Locktite Hysol 3475, a two pack aluminium epoxy, as the ultimate solution. To be absolutely sure that it would be oil and temperature proof, I contacted the Locktite helpdesk, and they agreed with my colleagues advise. http://www.loctite.be/cps/rde/xchg/henkel_bef/hs.xsl/3888_BEF_HTML.htm
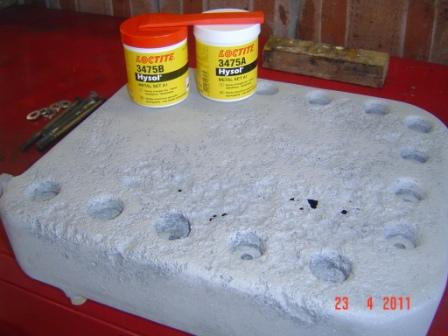
They were very helpful and even phoned me a few days later to give me some extra tips and tricks, so I started to work. First I had the oil pan slightly sandblasted to give the product a better grip, and then I used it further completely by the book. It was very easy to use, and gave directly a good feeling about the end result. A satisfying result that I became after 3 thin layers of product, slightly sanding the stuff between every layer. Take it slow but perfect, rather than trying to do the job fast and in one movement. Once the outside was finished, I added as an extra a thin layer by brush on the inside of the pan. Just to insure that it would be leak proof.
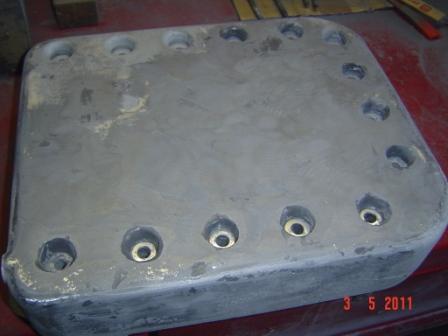
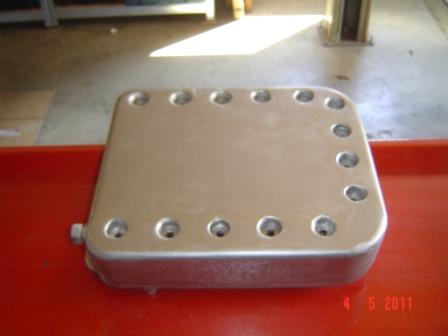
Afterwards I made it all straight with some abrasive paper on a wooden block, and sprayed aluminium paint on it. The result looks very good and perfectly usable, if it not leaks... So as the ultimate leak test I filled it half with white spirit, left it in for a week, and it has lost nothing. So I think the result is OK!
07-05-2011, 00:00
Geschreven door Jeff OdH 
|


