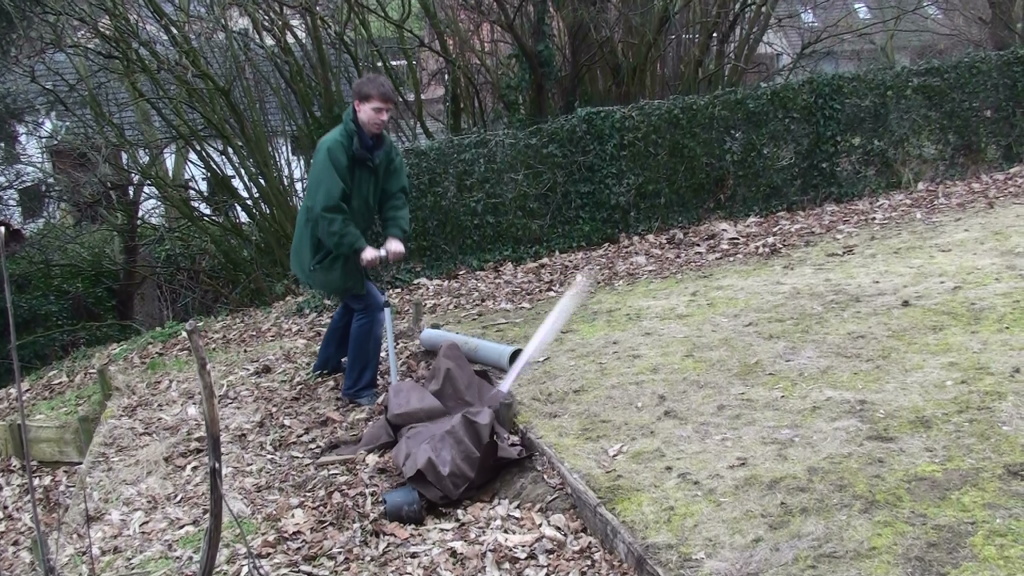
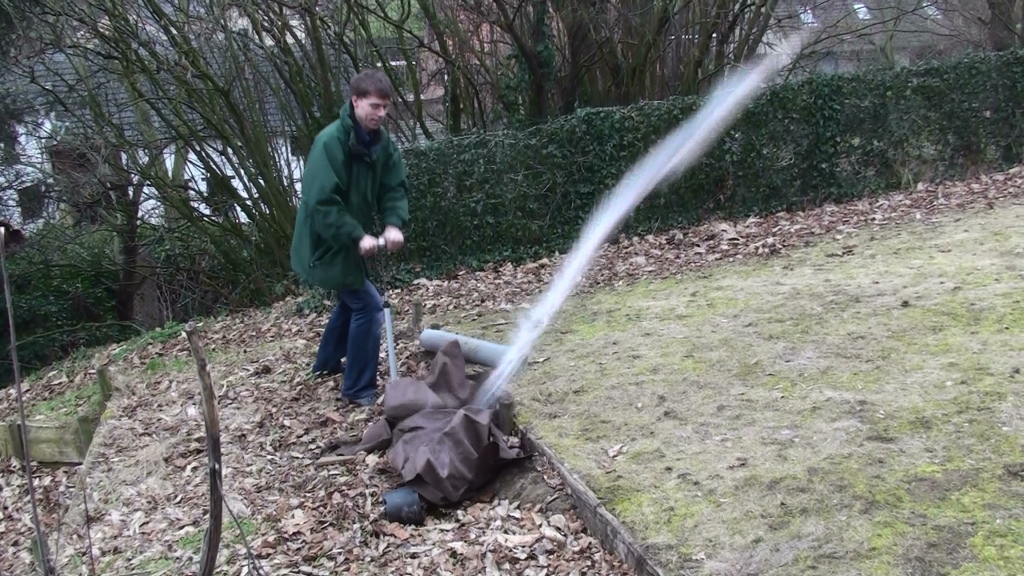
Compressing of air generates heat. We can feel it at the bicycle pump but the air in the bottle also becomes warmer. When we launch the rocket - or release the air through the abort valve - it will cools down fast. It just works like a fridge: the pump is the compressor, the rocket is the condenser and the valve the evaporator. Because the coolant is air it will also cool down in the condenser because of the expansion of the gas and we stopped the compressor. I have a thermal camera so I used it to see the temperature changes. I pressurised to 8 bar, let the bottle cool down to ambient temperature and pulled the 'abort' string to release the air fast without the bottle leaving the launch-pad.
All work and experiments are coming together to complete 3 new water rockets. 1. An upgrade of the 'Black Beauty' to a 2.1L rocket (with a classic Robinson coupling: 1.5+0.5L) but without parachute. In the previous versions the parachute never came out so I hope the nose comes off at apogee and the rocket tumbles down 2. a Ø88 mm rocket with cargo and parachute. A modular system so the volume can be increased. 3. a Ø97 mm rocket with cargo and parachute. A modular system so the volume can be increased. The 1.5L bottles are Ø88mm, the 2.0L bottles are Ø97mm.
After several failures off spliced bottles, I started to make Robinson couplings but with the bottoms together. This makes a pressure vessel of 3.25L (with 2 x 1.5L bottles) or 4.25L (with 2 x 2.0L bottles). I connect these pressure vessels with 2 bottles caps glued together and drill a hole of Ø5 to 10mm.
For 1 connection I used "Bison Combi" and no screws. (A) For 1 connection I used "Bison Combi" and 2 screws. (B) For another one I first drilled a large hole trough both caps and then filled it with PU FIX. When it was cured I drilled a new hole, smaller than the first so the air can pass trough it. (C)
I did test the combination of 2 vessels and 1 connector. (A) did stand till 7.5bar but then after 1' at 7.5 bar it suddenly started leaking and the upper part flew away. (B) and (C) did stand the test at 120 psi for some minutes All pressure vessels did stand 120 psi. (2 x 3.25 L and 2 x 4.25L)
I also prepared a cargo bay and parachute deployment system for Ø88 and 97. The cargo bay can carry 2 MD80 camera's. An other cargo bay will also have a side opening system with Tommy timer to release an other payload on apogee. This can be a small tin soldier on a parachute or other slow falling objects. The parachute deployment system is a side deployment system with Tommy timer.
For the longer rockets I upgraded the launch pad with a guide rail.
After these successful tests I can start assembling all parts and prepare the launch.
In relation to a post of Georges Katz on http://aircommand.blogspot.com/2012/01/progress-update.html I started thinking about a system for cluster launcher with 3 boosters and a main rocket. There could be a problem with the forces from the boosters pulling on the main rocket and the strength of the bottleneck. In case of the Polaron G2 - Phase 2 the tensile force will be 2000N. (3 boosters and a main rocket on 17 bar and Ø22 mm nozzles)
One of the manners to solve this problem is to make a release system for each of the boosters and the main rocket. In the normal way (gardena launcher / cable tie launcher) there will be a problem of synchronisation between the nozzles to release. If one nozzle is released 0.1sec too early the rocket could be damaged.
After some brainstorming I came up with the idea to design a release system with electromagnets. * Connect a metal plate above the collar of the bottleneck Ø of the plate +-80mm * Reinforce the bottleneck * install 3 electromagnets around each launch tube that make contact with the metal plate. Make sure they are well attached to the launch platform * connect all the electromagnets to a power supply and use a switch so you can cut off the power to all magnets simultaneously. You just have to push one button to launch the cluster rocket
You can even use the same switch for different launch pads so you have a drag race between different rockets.
I made a drawing of the principle (top en front view)
To take rockets to greater heights, a staging mechanisme may be a way to reach this goal. By dropping some weight the upper part can fly higher. So I started to develop my own system with easy to obtain components.
The idea is to attach the second stage to the first with tie-wraps and release it with a release ring. This is a system that has proved its worth in launching water rockets.
The mayor difficulty was to make a piston out of standard materials that's cheap and won't leak and let the air flow free from the first stage to the second but not back to the first (after launch). This piston should pull the string of the release ring.
After some days I knew how I would make it.
Beneath you can find some pictures, drawings and a short film
Piston with release ring:
Bottlecap and nozzle 2nd stage:
bottlecap and tie-wraps 1st stage
Complete staging mechanism:
Drawing of Piston
Drawings bottle caps and tie wraps Complete staging mechanism:
film with: * test on the launch pad - the pressure in the 1st stage is release by the abort valve * test with 2 dummy rockets * first flight - see also flights 11/11/2011
Deze blog is nog in opbouw. Nog niet alle vluchtdagen zijn vermeld. Deze worden in de loop van de komende weken toegevoegd. Ook over elke raket apart, het lanceerplatform, het 2-trapssysteem en de parachute systemen komen aparte berichten met technische uitleg, filmpjes en foto's - ook in 3D en te bekijken met een rood-blauw brilletje.
Kom dus gerust later nog eens terug om deze aanvullingen en nieuwe ontwikkelingen te bekijken.
De laatste weken werd er verder gewerkt aan een kleine raket met parachtesysteem, een 2-traps raket en werd de launcher nog aangepast. De kleine raket is de SBR2/88-330 of de Black Beauty. Bij deze zit de parachute onder de neus (in-line deployment system). Het afvallen van de neus wordt getimed via een 'Tomy Timer' De 2-traps raket bestaat uit een booster van 3L (MBR2/88-540) en een 2e trap van 1.5L (SBR3/88-330). Meer info over het 2-trapssysteem volgt later in het technisch gedeelte van de blog. De 1e trap heeft een parachute die automatisch vrij komt bij vertrek van de 2e trap. De 2e trap heeft nog geen parachute systeem. De Gardena launcher werd verbeterd door een 'launch tube' bij in te lijmen en de oranje Gardena 'release ring' werd vervangen door kabelbinders en een PVC 'release ring'. De MBR3/97-815, Red Rocket, met parachute die langs de zijkant uit de laadruimte komt (side deployment system), mocht ook nog enkele vluchten maken.
Peter had ook 2 raketten voorbereid. Een 2L fles en een muzikale 4L raket met parachute met opening van de parachute met het mechanisme uit een muziekdoos .
Aan het begin van de lanceringen was het nog mistig waardoor de belichting niet echt goed was. Later kwam de zon door de mist en was het een stuk duidelijker. De eerste 2 vluchten waren van de MBR3/97-815. Telkens geslaagd met opening van de parachute. Hij had toen telkens 1 on-board camera; jammer genoeg was deze niet ideaal gericht. Het bevestigen van de 2e camera wilde niet lukken omdat de tape door de koude niet wou plakken. De laatste vlucht van de dag was ook met deze raket. Er werd toen toch nog een 2e camera ingebouwd. Met het zonnige weer gaf dit mooie luchtbeelden.
De 2L raket van Peter was de lichtste en ging het hoogste en verste; maar kwam ook het snelste terug.
Bij de eerste vlucht 4L raket ging de parachute te vroeg open waardoor deze scheurde. Dit kon echter hersteld worden voor de volgende vluchten. Deze slaagden telkens goed.
De eerste vlucht met de2-trapsraket liep fout. Het koordje voor het weghalen van de release ring van de 2e trap was losgekomen van de zuiger. Na vervanging van de neus kon deze nogmaals vliegen. Bij de 2e vlucht liep alles goed. Door een lek in de booster kon de druk echter niet boven 6 bar gebracht worden.
De 1e trap van de raket werd ook apart gelanceerd zonder parachute systeem. Deze mocht hierbij crashen met schade omdat ze toch reeds lek was. Ze ging redelijk hoog en kwam ook aardig snel op de grond neer.
De Black Beauty maakte 2 vluchten. De neus kwam er wel telkens af en de parachute eruit maar deze ging niet open. Dat de raket in 3 delen naar beneden kwam, zorgden ervoor dat ze niet hard en snel op de grond viel. In de toekomst ga ik de raketten met 1.5L flessen ook uitrusten met een side deployment system voor de parachute.
Na geslaagde vluchten 14 dagen geleden was de raket in staat nog enkele vluchten te maken. We zochten hiervoor wat meer open ruimte op. We lanceerden 2x op 7 bar. De parachute zat onder de neus die er tijdig moest afvallen. De neus bleef er echter steeds op zitten en de parachute ging dus nooit open. Dit gaf wel enkele mooie crashes.
Via Google en Youtube vond ik de site van Air Command Water Rockets. Hierop stonden veel nuttige tips en heel wat mooie video's. Genoeg inspiratie om een 'Gardena launcher' te bouwen. Kort samengevat: je combineert een dop van een fles met een Gardena kraanaansluiting. Dit kan je dan op de fles schroeven en wordt de uitlaat (nozzle). De waterraket wordt op een Gardena connector geplaatst. Deze connector is verbonden met een tuinslang waarlangs de lucht in de fles wordt gepompt. Via een touwtje kan je de oranje ring naar beneden trekken waardoor de connector los laat en de fles zichzelf de lucht in stuwt. Meer info later in het technisch gedeelte
De eerste vluchten waren met gewone flessen zonder vleugels en neus. We lanceerden maar op 5 a 6 bar omdat hij anders te ver weg zou vliegen. We stopten omdat de raket verdween in een boom en we hem niet direct terugvonden. Later konden we ze toch nog recupereren.
23/02/2011 - De eerste stappen ~oops~ vluchten / First Flights
Een tijd geleden kwam ik een artikel over waterraketten tegen. Het leek me wel leuk zelf eens wat te proberen. De eerste experimenten vonden plaats in februari - tijdens Matteo's zijn verjaardagsfeestje. Het was een eenvoudige fles met kurk en fietsventiel en vlogen toch dik 10m ver. Vastleggen op film lukte niet goed omdat de raket onverwacht vertrekt.
Eng: First attempts with simple bottle, cork en tyre valve on a birthday party