Talking about new features, useful things, frustrations in .NET and so on...
06-09-2007
ASP.NET - Asynchronous call to a webservice with impersonation
I stumbled across something annoying on my crusade through the forest of webservices today.
When impersonation is enabled, the running thread obtains the identity configured in the web.config file. Not much to worry form then, calling webservices will be running in the same context.
This behaviour is nice and easy, until you implement an asynchronous call to a webservice or an asynchronous call to a data source. Impersonation is not inherited from the calling thread, which might deliver unexpected results, by some called exceptions, errors or whatever. (InvalidOperationException is the most likely exception to be thrown.)
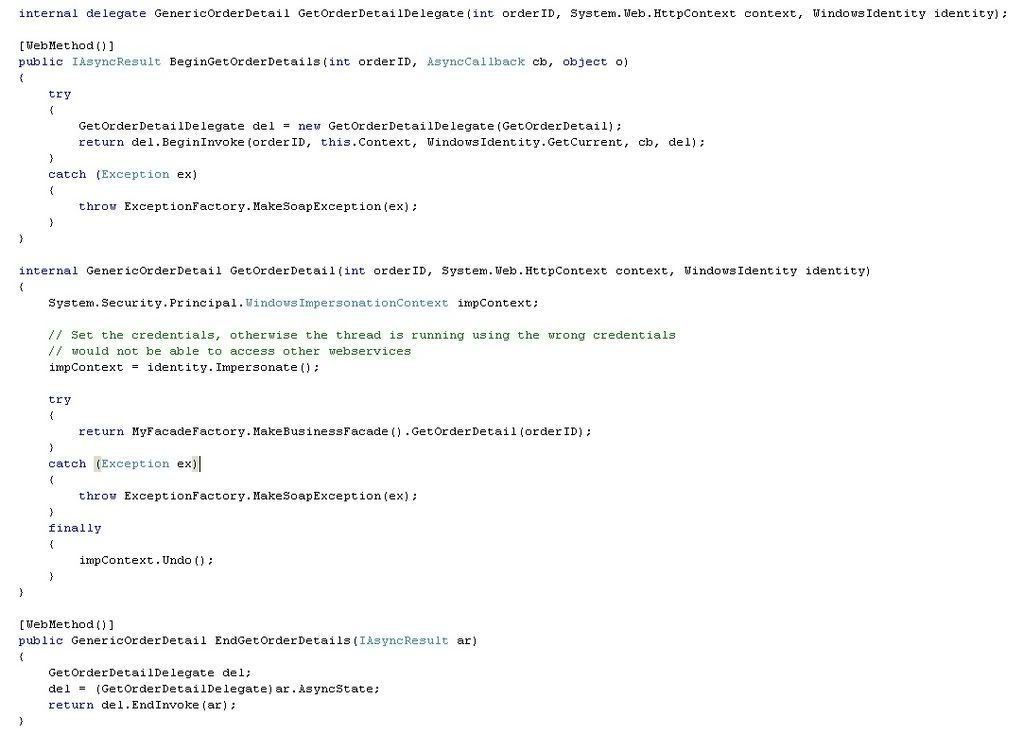
To prevent that, get the current identity before the BeginInvoke method, supply it as a parameter to the delegate method and set the impersonation context in the other thread. Perform some other context or session related stuff if needed and load your data. Don't forget to call the Undo() method in a finally block to restore the previous security context.
That's it !
web.config :
Web method :
Calling method :
Of course you can also call the webservice itself asynchronously, by adopting a similar code as seen above in the web method. Again all that's needed is to impersonate the WindowsIdentity in the context before calling the BeginInvoke method and end with the Undo() method.
ASP.NET - Custom object as parameter for ObjectDataSource
Lately I
heard a remark that its not possible to supply other parameters than strings
to filter the datasource in order to fill a gridview. Since I was
quite sure thats not the case, I accepted the challenge (from myself) to prove
him wrong.
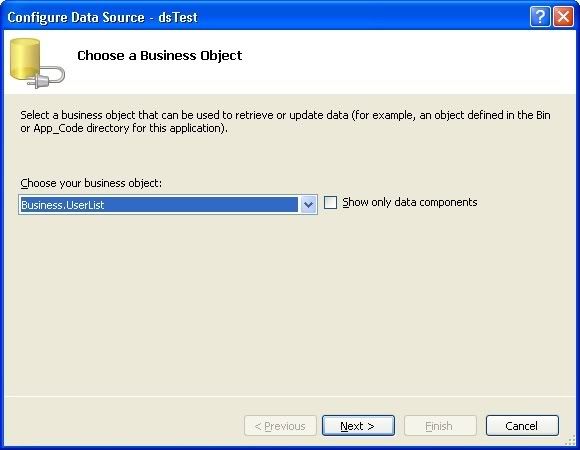
First add (drag/drop)
an ObjectDataSource object to the page or user control. Configure
the datasource to use a list of objects (here an object of type UserList).
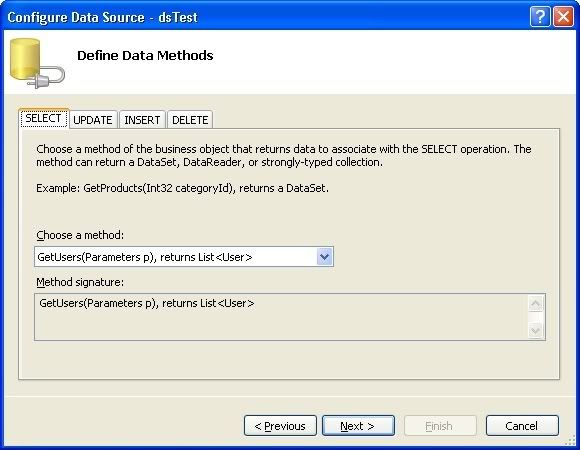
Now define
the (static) method used to load this object.
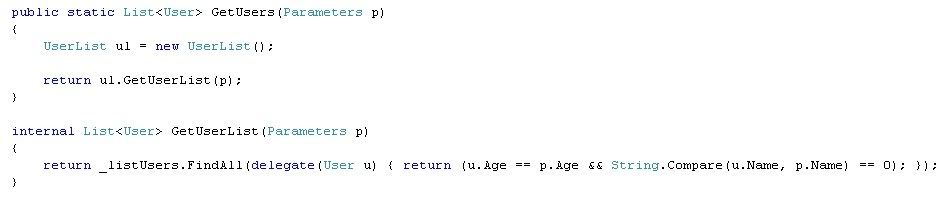
This is how
the methods in the Business Object look like (just an example).
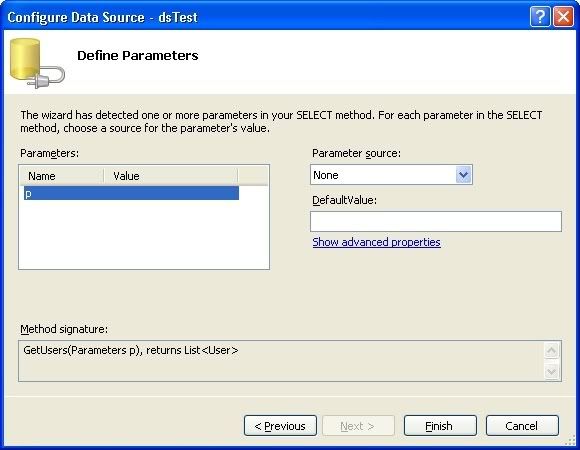
The
parameter(-s) will now be visible on the next screen, dont choose a source in
here!
After
finishing the wizard, the result is this :
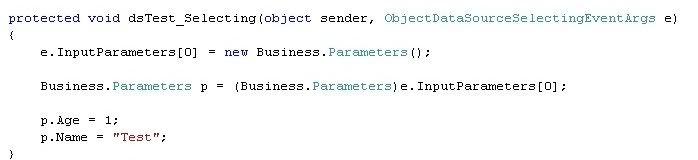
Now all
thats required is to modify the InputParameters in the Selecting event of the ObjectDataSource.
If
you set the identity impersonation to true, but do not specify a user
name and password, then the worker process attempts to access files as
the IUSR_machinename account.Now, specify a user name and password in the <identity> element, such as
In
this setup, it is true that the ASP.NET worker process still runs as
system, but when the worker process tries to access files on the server
(either in the virtual directory, or in the Temporary ASP.NET Files
directory for just-in-time compilation), it does so as the user
specified in the <identity> element, not as the system user.
As a result, it's necessary to allow this user to access the following folder (otherwise you will get Access Denied errors) :
C:WINDOWSMicrosoft.NETFrameworkv2.0.50727Temporary
ASP.NET Files
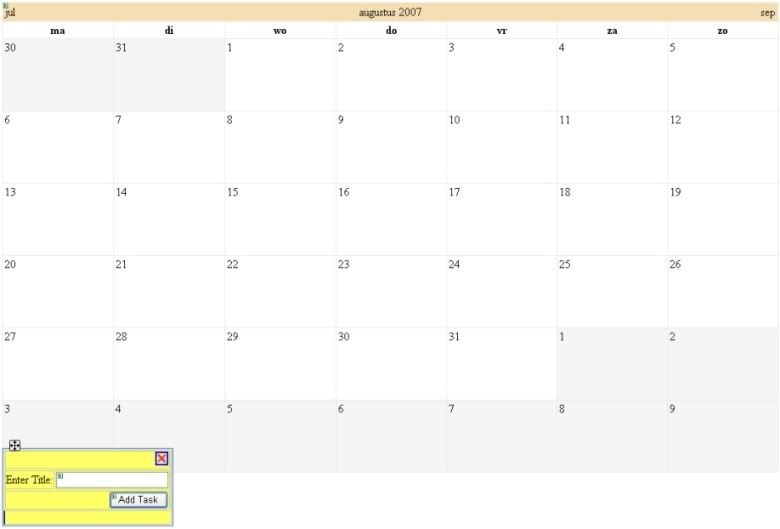
Most of the time a calendar is used to simply select a date, in some cases it will be stretched to give an overview of a schedule, getting the same look and feel as MS Outlook.
Now, what if you want to be able to add an event to a date ?
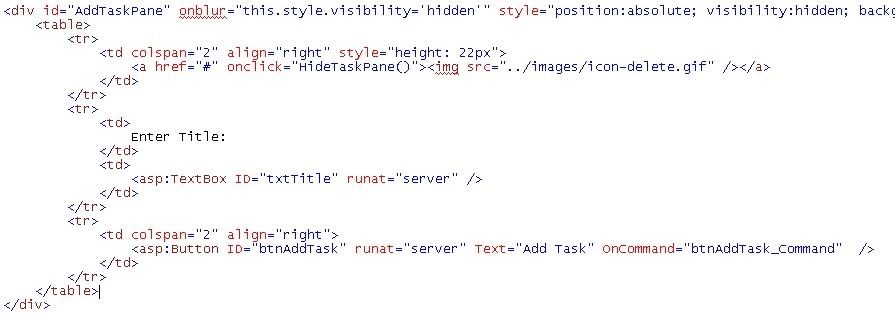
First drop a calendar control on your web user control or web page, be sure to stretch it in a similar way as below. Add a div containing one or more fields to insert info of the new events.
E.g.
Next step is to add 3 javascript functions : HideTaskPane ShowAddTaskPane ReceiveServerData
HideTaskPane will simply hide the div.
ShowAddTaskPane accepts 2 parameters, eventargs and the selected date. The function will display the task pane (the div) and call the server (by using a callback eventhandler, see later) to store the selecteddate, e.g. in the viewstate.
ReceiveServerData is called after the callback eventhandler, this can be used to display the data received from GetCallbackResult() (again, see later).
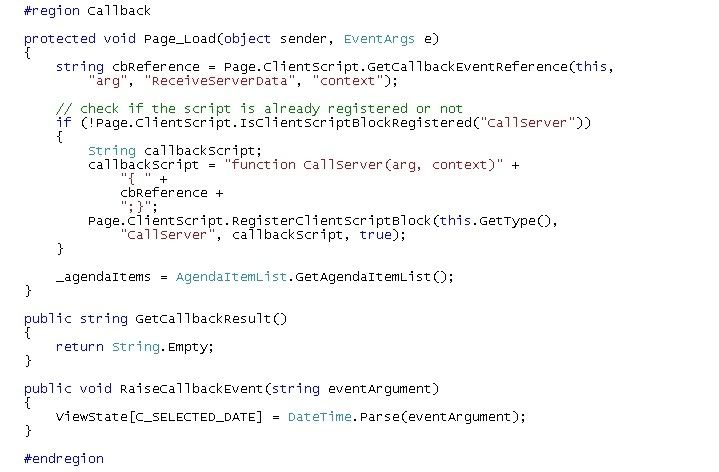
Now, moving to the C# (or VB.NET) code :
Dont forget to inherit from ICallBackEventHandler (in the System.Web.UI namespace).
In the Page_Load event, register the callback script if its not yet registered. The server-side RaiseCallBackEvent method is called from the client-side ShowAddTaskPane function, you can add the selected date to the viewstate and/or perform some other actions here. GetCallBackResult can be used for testing purpose (e.g. return the selected date from the viewstate) or to return data from the server to the client.
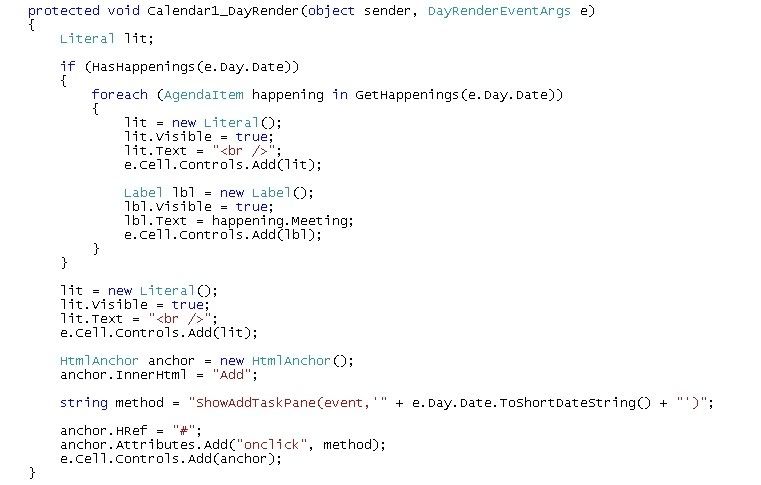
Last step is to add code in the DayRender event of the calendar. This is the place in which you can add controls to a day. This sample code will add events from a list of AgendaItems. Literals can be used to insert crlfs, labels to add existing events. An HtmlAnchor is used as a link to display the task pane, calling ShowAddTaskPane on click.
Web Parts are very useful to enable end users to modify the look and feel of your website : the content, appearance and even the behaviour can be changed, this is possible without writing any code.
First drag a WebPartManager control to the web page. This control must appear before any other Web Part control, otherwise a runtime exception will be thrown (and that's not exactly what we want...) Next add WebPartZone controls to the places where you want [an end user] to see Web Parts; you can do this inside a table to get a basic layout. The title can be changed in the HeaderText property. You can now start adding (in the design view) some web user controls to the WebPartZone controls by dragging and dropping.
A quick preview in a browser shows us the controls have a title "Untitled", this can easily be changed by adding title="" in the source code (the intellisense won't recognize it, don't worry about that) :
Now, all the above is quite useful, but to let the user interact with our web parts, a few things are still missing. Add an EditorZone and a CatalogZone the same way as the WebPartZone's above. Make sure not to add them to an existing WebPartZone as this will generate a runtime exception. In the EditorZone you can add an AppearanceEditorPart, LayoutEditorPart and BehaviorEditorPart, depending on what you want the end user to do. In the CatalogZone you can add a DeclarativeCatalogPart (when you want to add another instance of a predefined user control), a PageCatalogPart (to retain an existing control when you closed it) and an ImportCatalogPart (to import a non-defined user control).
When taking a quick look in the browser (after building...), you see none of the above appears... This is because the current view is set to the default view : Browse. Now let's add a control displaying the different modes, the first code that has to be written (except HTML...) ! (I chose a radiobuttonlist called rbListModes)
Make sure to set the AutoPostBack property of the control to "true" and start the application. When switching between the different display modes, you will be able to change properties and add/remove controls. To edit a control, switch to the Edit mode and click on in the right upper corner of the control and choose "Edit". The Editor parts added to the EditorZone will now become visible. To retain a closed control, switch to Catalog mode and navigate to Page Catalog, you will be able to display the control in the WebPartZone of your choice.